 DOCUMENTATION
Up-Front Control Display (UFCD)
The Up-Front Control Display (UFCD) is your quick-access panel for radios, transponder, destination points and timers. Its keypad and twin knob also serve as the data-entry device for the MFDs. The UFCD can display eight pages, each selected with its own page key.
The Panel
Layout
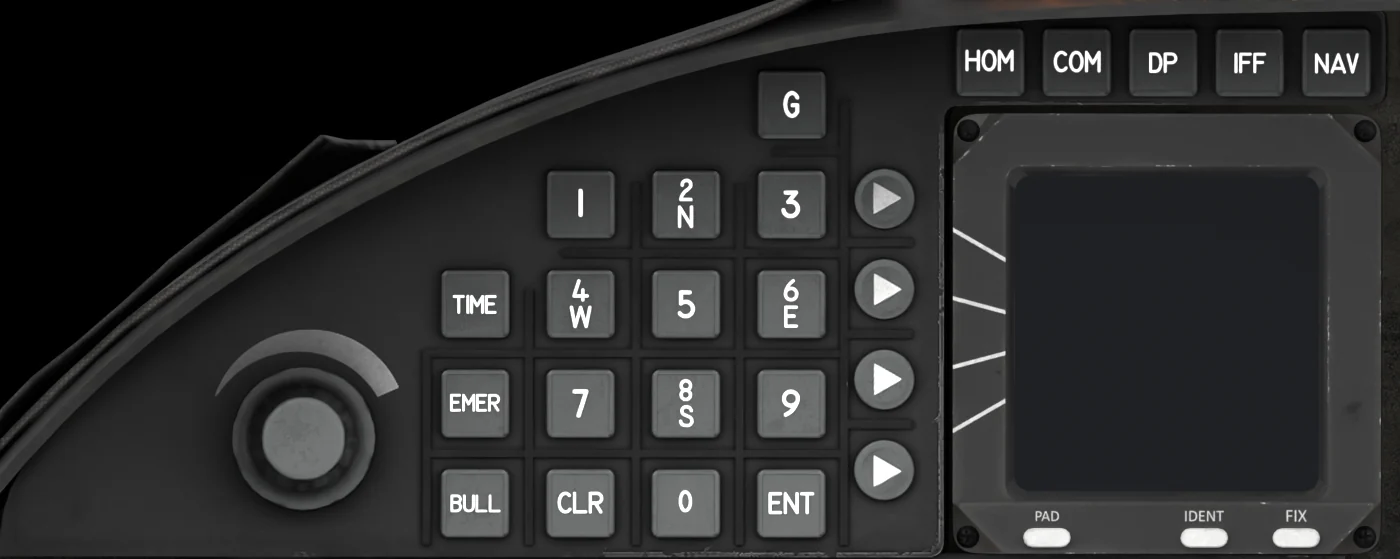
- Page Keys: HOM COM DP IFF NAV above the screen. A page key always shows its page.
- Line Select Keys (LS1-LS4): One for each of the four data lines. Press to put the entry cursor on that line.
- Keypad: 0-9, CLR and ENT.
- G Key: Mutes the guard receivers (see below).
- Page Keys, second group: TIME EMER BULL.
- Twin Knob: Large outer ring for coarse changes (whole numbers), small inner knob for fine changes (decimals). The small knob can also be pushed. The same knob serves the MFDs, and it can page the center MFD (see Remote MFD Paging below).
- PAD, IDENT, FIX: Special function keys below the screen (see below).
- Screen: Top line: clocks (GMT left, elapsed time right). Four data lines. Bottom line: the scratch pad, which normally shows your active steer-point number.
Screen Colors
Green = active value · White = available / inactive · Cyan = labels · Yellow = "please confirm" · Magenta = standby, and the steering status on the NAV page · Reverse video = typed but not yet entered.
Power and Self-Test
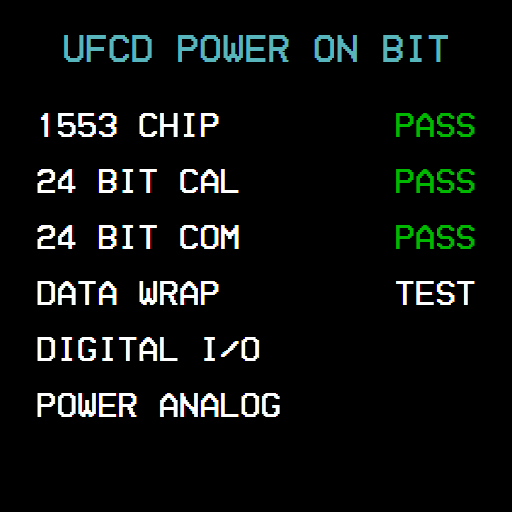
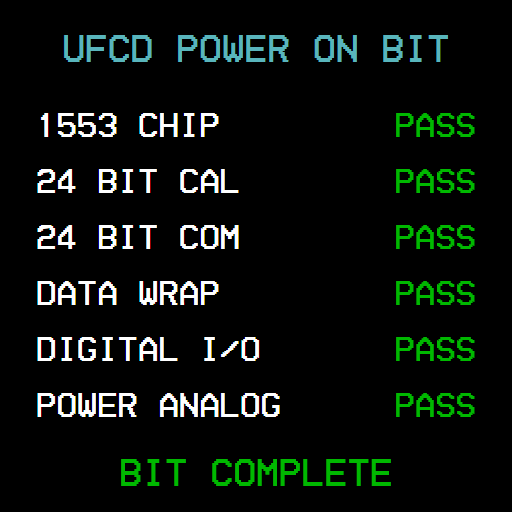
Switch UFCD ON on the right console (needs DC power). When you switch it on in the cockpit it runs a 9-second power-on test - test patterns, then UFCD POWER ON BIT with six items that each go PASS - and then shows its pages again (HOM after a cold start).
Keys are ignored during the test. Brightness is on the UFCD/SFD LIGHTS knob. Your data survives a UFCD power cycle.
Example UFCD power-on test, line pattern

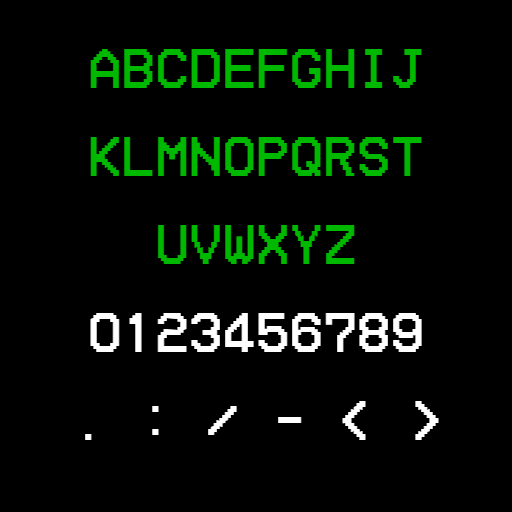
Example UFCD power-on test, character set
Example UFCD power-on BIT running
Example UFCD power-on BIT complete
NO COM
The UFCD reaches the rest of the aircraft through the AVP. While the AVP is off or still starting, the screen shows only NO COM and no key works - not even FIX, IDENT or G. On a normal cold start the pages come up by themselves as soon as the AVP is running.
If the AVP is lost after it has been up, NO COM stays even when the AVP comes back: switch the UFCD OFF and ON again (another 9-second test) to get the pages back.
Example UFCD NO COM

Entering Data
The Golden Rules of Data Entry
- Select - press the LS key beside the line. A green box appears on the first editable field. Press the same LS key again to move the box to the next field on that line.
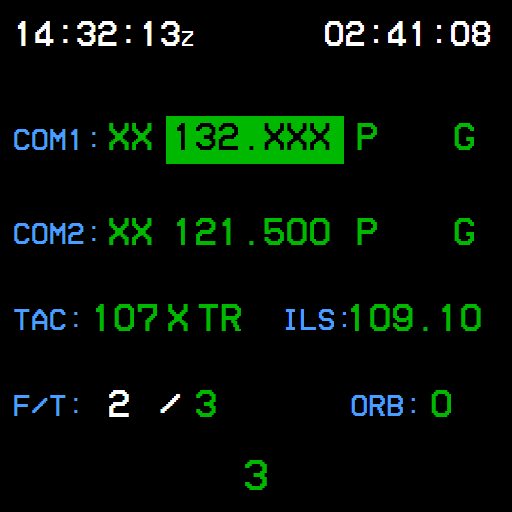
- Type - digits appear in reverse video, with X for positions not yet filled.
- Press ENT - nothing you type is ever used until you press ENT. There is no auto-enter and no time-out.Missing digits are filled with zeros: 1245 ENT gives 124.500.
- Knobs act immediately - no ENT needed. Turn quickly for ×10 steps.
- ON/OFF-type fields step to the next option with ENT, a repeat LS press, or the knob.
- Invalid entry - the rejected value flashes and the old value is kept. Press CLR or just type again.
- CLR cancels what you are typing and restores the previous value.
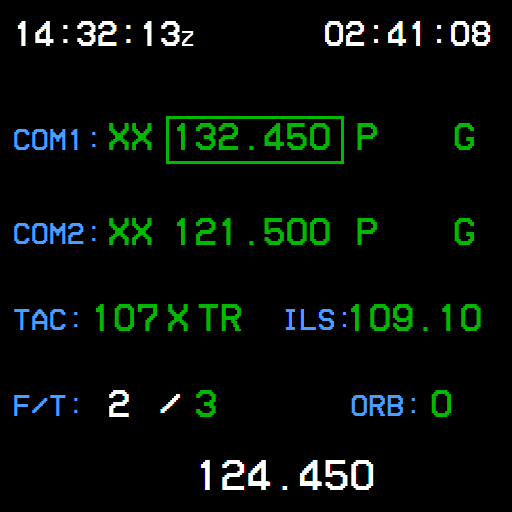
- Recall - when you change a number, the previous one is shown in white on the scratch-pad line. Press ENT with nothing typed to swap back (handy for "back to the last frequency").
- Yellow prompts such as ENT TO CONFIRM? need a second ENT; CLR cancels.
Example - tune COM1 to 132.450 on the HOM page
Example HOM page, box on the COM1 preset
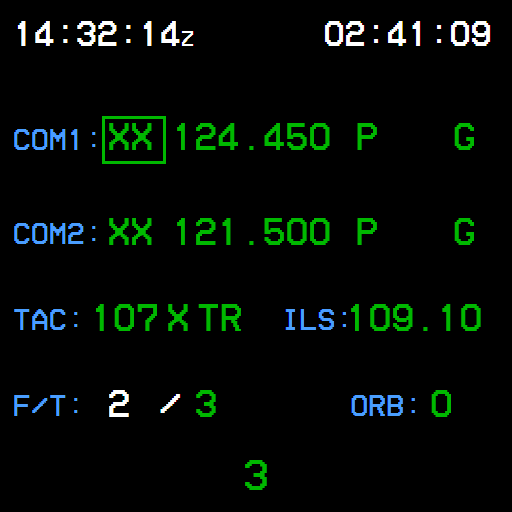
Example Box on the COM1 frequency
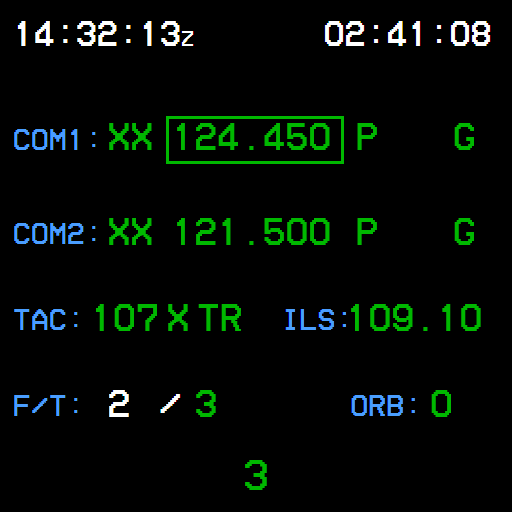
Example Typing 132
Example COM1 tuned to 132.450
The Special Keys
| Key | Function |
|---|---|
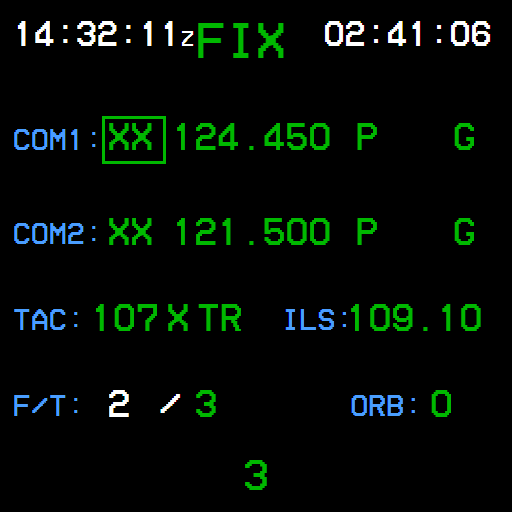
| FIX | Records your present position, time, speed and heading. The fix appears in the MFD NAV → FIX table. FIX flashes at the top of the screen. |
| IDENT | Transponder ident (see IFF). |
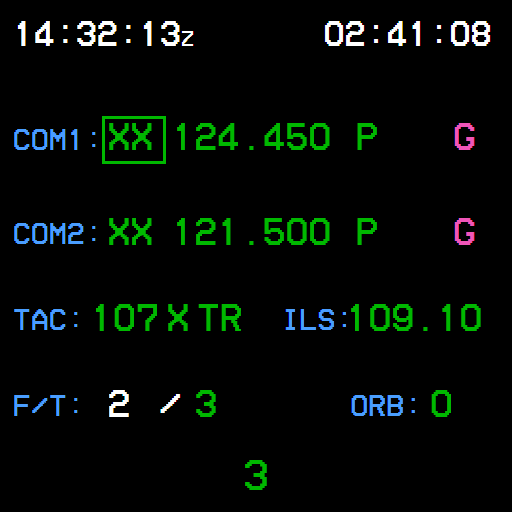
| G | Mutes the guard receivers of both radios: one press for 30 s (magenta G, then green again), a second press within 1.5 s until you press G again (white G, which stays lit). A press while guard is muted brings it back (green). It does nothing with GRD OFF and never changes the radio frequency. Indication only - the sim has no separate guard audio. |
| PAD | Switches the scratch pad on or off, for typing a number first and sending it afterwards. It comes on by itself when an MFD field is opened for editing - this is how you key numbers into an MFD field. With the pad on and empty, two pushes of the small knob start remote MFD paging. See below. |
Example FIX legend
Example Guard inhibited
Radio Pages
HOM - Home Page
Example UFCD HOM page
- LS1 - COM1: preset (-- = none), frequency, P = plain voice, G = guard receiver: green on, magenta muted for 30 s, white muted until you press G again, blank off.
- LS2 - COM2, the same fields.
- LS3 - TACAN channel, X / Y, mode, and the ILS frequency (NAV 1).
- LS4 - Steering line: here F/T from DP 2 to DP 3, no orbits.
- Clocks - GMT (Z) on the left, elapsed time on the right.
- Scratch pad - Your active steer point (green), or the recall value (white) after a change.
| Field | Entry | Effect |
|---|---|---|
| COM1 / COM2 preset | 0-25. 0 = guard 121.500. | Tunes the radio to that preset. |
| COM1 / COM2 frequency | 118.000-136.990 MHz on the 8.33 kHz channels (118.000, 118.005, 118.010, 118.015, 118.025 ...). Large knob 1 MHz, small knob one channel; both wrap round the band. Any other frequency flashes and is refused. | Tunes the simulator's COM 1 / COM 2. The old frequency goes to standby. This is a manual tune: the preset goes back to --, here and on the MFD COM page, so no preset tunes over it. |
| TAC channel, X/Y, mode | Channel 1-126, e.g. 57 ENT; X/Y toggles. | Tunes the TACAN. With the TACAN switched off (the audio panel TACAN knob at its stop) the X/Y and mode fields show dashes. |
| ILS frequency | Localizer frequencies 108.10-111.95 only, e.g. 1095 ENT = 109.50. | Tunes NAV 1. |
| Steering line (F/T, T/T, T/F, TTD, TFD or EMER) | Follows the steering mode. In F/T: "To" destination point 1-99 (confirm with ENT; "From" is set automatically) and ORB 0-15. In T/T: the two TO DPs. In T/F: DP and course. TTD / TFD add NM 1-128. EMER shows the selected airfield. | Entering a TO DP is a direct steer. Shared with MFD and BCDU. |
Radios are VHF
The simulator's COM radios are VHF (118-137 MHz), so the UFCD accepts VHF frequencies only. UHF entries are rejected, and guard is always 121.500. The P (plain voice) indication is fixed.
COM Page - Radios
Example UFCD COM page
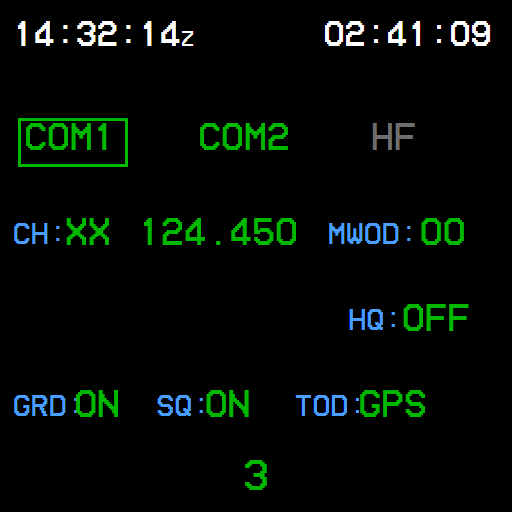
LS1 steps across the tabs COM1 and COM2 (HF is greyed out - not fitted); the lines below switch to the selected radio. CH: and the frequency work exactly as on HOM. GRD: switches the guard receiver on or off (it is ON by default and controls the G shown on HOM); its ON takes the color of the G.
A runway start comes up with guard muted: white G. Neither GRD nor the G key retunes the radio - only preset 0 puts it on guard. TOD: is selected with the knob and confirmed with ENT. MWOD (00), HQ (OFF: HAVE QUICK is not modeled) and SQ are fixed displays.
IFF Page - Transponder
Example UFCD IFF page
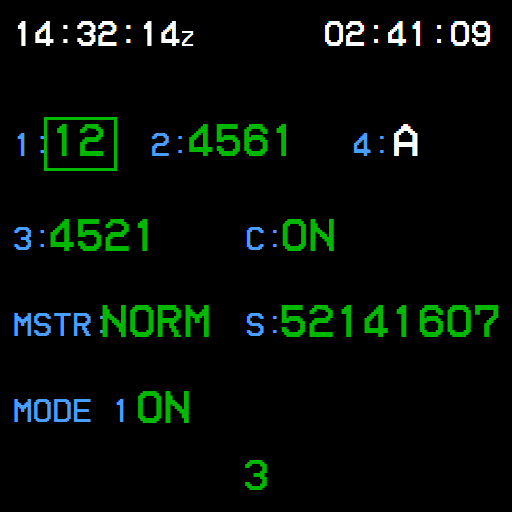
- Squawk: LS2, type four digits (0-7 only), ENT. This is the simulator's transponder code - a code set by ATC or on the MFD shows here too.
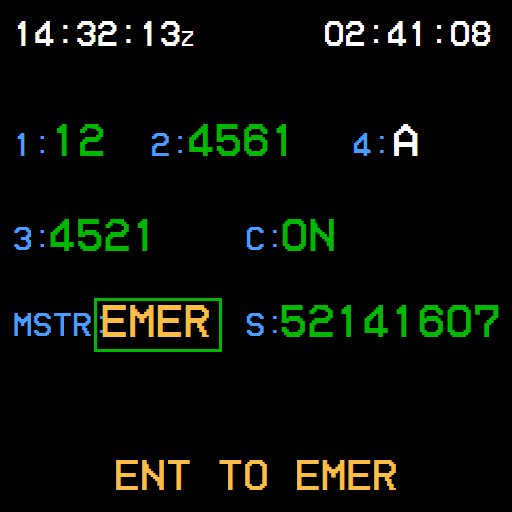
- MSTR: (knob only) - STBY = transponder standby; NORM = replying (Mode 3 and C ON = with altitude, C OFF = without altitude); EMER needs ENT to confirm, squawks 7700, and restores your previous code when you leave EMER.
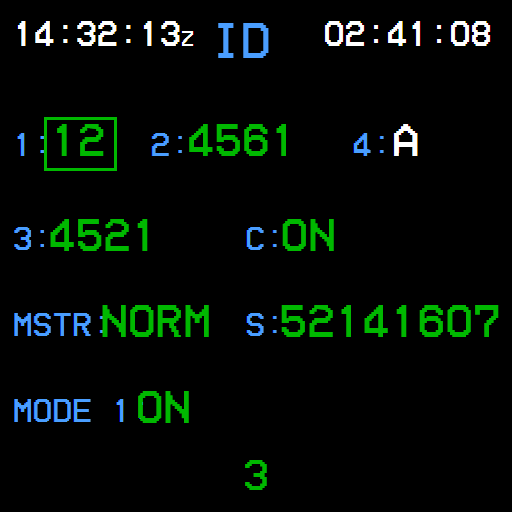
- IDENT key - sends an ident (needs MSTR NORM and a mode switched ON). ID shows at the top of the screen for 20 seconds.
- The IFF needs its own power: the IFF switch on the right console. With it off the page shows MSTR: OFF and the transponder is off. It always powers up in STBY - remember to select NORM.
- Mode 1, 2 and S codes can be entered for realism but have no effect in the simulator. Mode 4 has one: its code is lost with ZEROIZE, with the IFF switch put to OFF without HOLD first, or with the IFF power off on the ground after a flight (Mode 4 then goes OFF).
Switching Mode 4 ON again without a code, with MSTR in NORM or EMER, gives IFF MODE 4 RPLY FAIL with the IFF lamp. Mode 4 OFF clears it; the code comes back with the next flight.
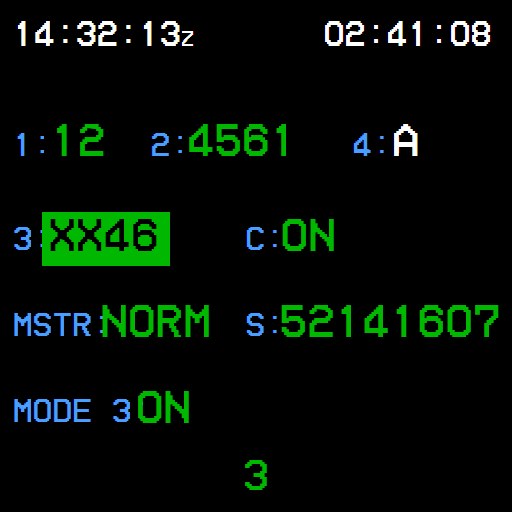
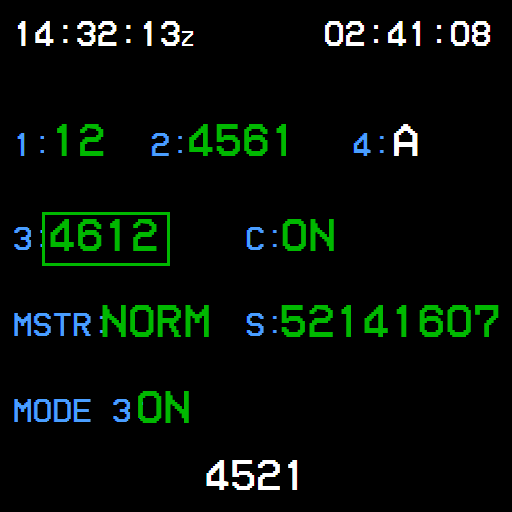
Examples - squawk 4612, select EMER, ident
Example Typing a squawk
Example Squawk 4612 set
Example ENT TO EMER prompt
Example IDENT
Navigation Pages
Destination points (DPs) are the U-2's waypoints. They live in files: A active route, ST1 - ST4 stored routes, E emergency airfields, B bullseyes, plus the UFCD-only file U.
| File | Holds | Points | Shared with the MFD and BCDU |
|---|---|---|---|
| A | The active route - the one the steering computer flies | 99 | Yes |
| ST1 - ST4 | Stored routes | 99 each | Yes |
| E | Emergency airfields, used by the EMER page | 16 | Yes |
| B | Bullseyes, used by the BULL page | 10 | Yes |
| U | UFCD-only points | - | No |
All 99 points of files A and ST1 - ST4 (16 in E, 10 in B) are shared live with the MFD (NAV/DPS page) and the BCDU - enter a point on one and it appears on the others within half a second. Only file U stays on the UFCD.
DP Page - Destination Points
Example UFCD DP page
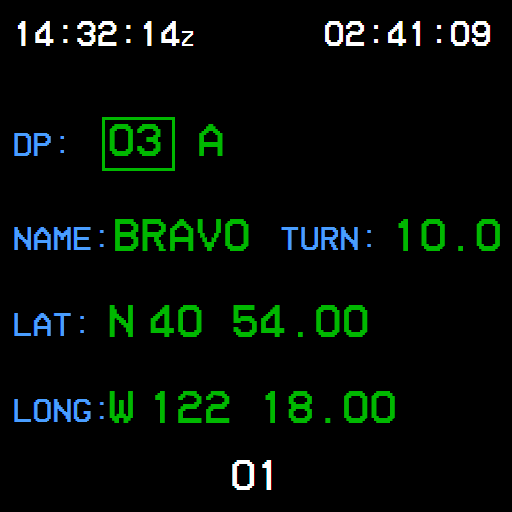
| Key | Field | How to enter |
|---|---|---|
| LS1 | DP number, then file | Number 1-99 + ENT. Second press boxes the file letter - cycle with the knob. |
| LS2 | NAME (5 characters), then TURN radius | Name uses the knob: large = letters, small = digits, push the small knob for the next character, ENT to store. Turn radius 0.1-99.9. |
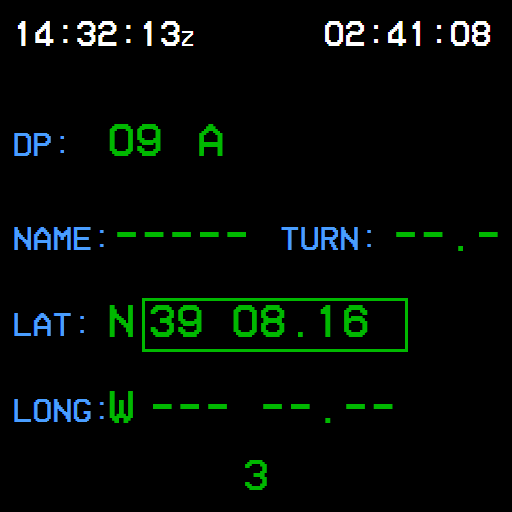
| LS3 | Latitude, then N/S | Six digits, degrees-minutes-hundredths: 390816 ENT = 39° 08.16'. Hemisphere: 2 = N, 8 = S. |
| LS4 | Longitude, then W/E | Seven digits: 1212619 ENT. Hemisphere: 4 = W, 6 = E. |
Example - start a new DP 09 and enter its latitude, N 39° 08.16'
Example New DP 09
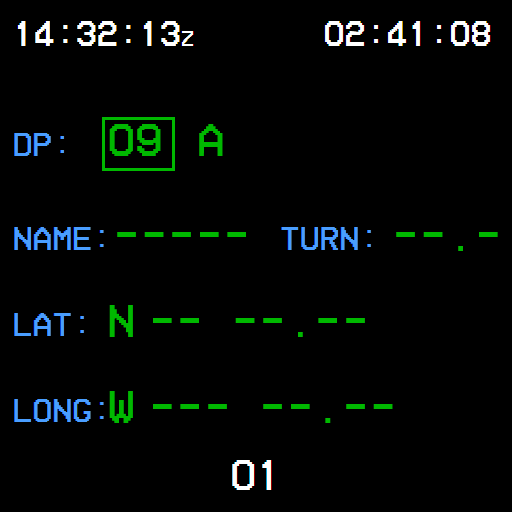
Example Typing the latitude
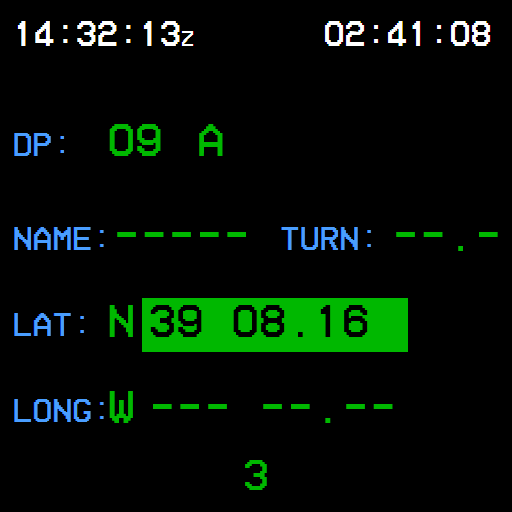
Example Latitude stored
NAV Page - Steering
Example UFCD NAV page
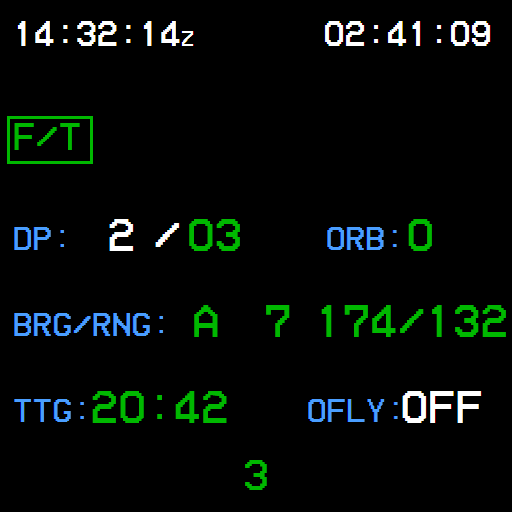
- LS1 - steering mode (F/T, T/T, T/F, TFD, TTD), confirmed with ENT. LS2 - the DP numbers / course / distance that go with it: in F/T the TO DP and orbit count, in T/T the two TO DPs, in T/F the DP and inbound course, in TFD / TTD also the intercept distance. Steering modes are explained under Navigation System (INS Steering).
- LS3 BRG/RNG: - a quick look-up: pick any file and DP number and read the live bearing (° true) and range (NM) from your INS position, with TTG (time to go) below. Until the INS is in NAV they show dashes. It does not change your steering.
- Right of the steering mode, a magenta message shows the steering computer's status: 128 MAX, 400 MAX, ZONE 1, ZONE 5 or OVERSHOOT TURN (explained under Navigation System (INS Steering)). In the EMER steering mode the page shows the emergency field instead: its name, BRG, RNG, TTG and DEST FOB.
- LS4 OFLY: - overfly ON/OFF.
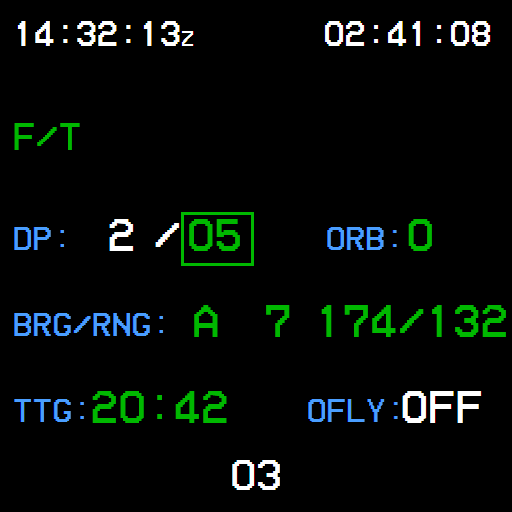
Example - steer direct to DP 05
Example Typing the TO DP
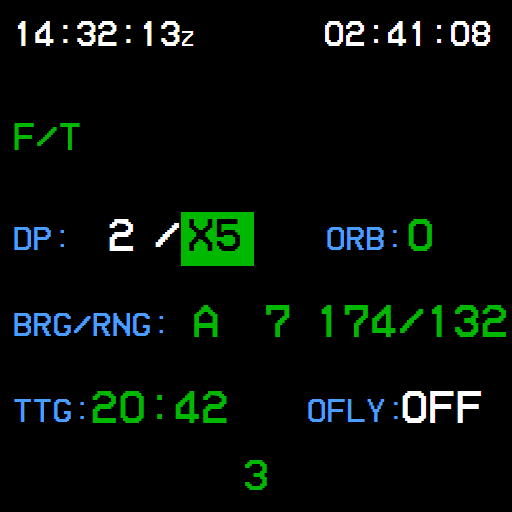
Example Direct to DP 05
EMER Page - Nearest Emergency Airfield
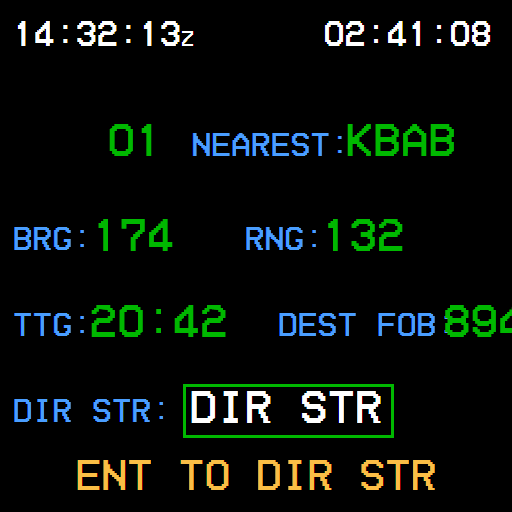
Lists the airfields in DP file E, sorted by distance from your INS position - 01 is the nearest. For the selected field you get bearing, range, time to go and DEST FOB - the fuel (gallons) you would land with at the present fuel flow. Until the INS is in NAV the fields stay in file order and these values show dashes.
LS4 boxes DIR STR and the scratch pad asks ENT TO DIR STR; ENT selects direct steering to the field. The steering computer then makes the EMER file your ACTIVE file - see Navigation System / EMER. While the autopilot is flying NAV the request is refused and DIR STR flashes.
Example UFCD EMER page
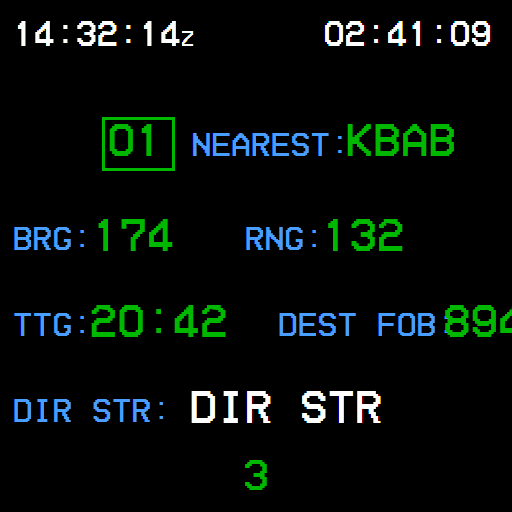
Example ENT TO DIR STR
Fill file E first
There is no built-in airport database. The EMER page only knows the airfields you (or the default data) have put in file E.
BULL Page - Bullseye
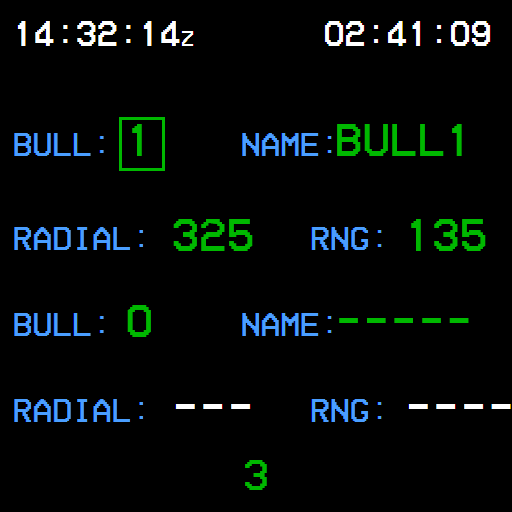
Shows two bullseye reference points from DP file B at once. For each: your radial (° true) from the bullseye and your range in NM, worked out from your INS position (dashes until the INS is in NAV). Select which bullseye (1-10) with LS1 / LS3.
Example UFCD BULL page
Time Page
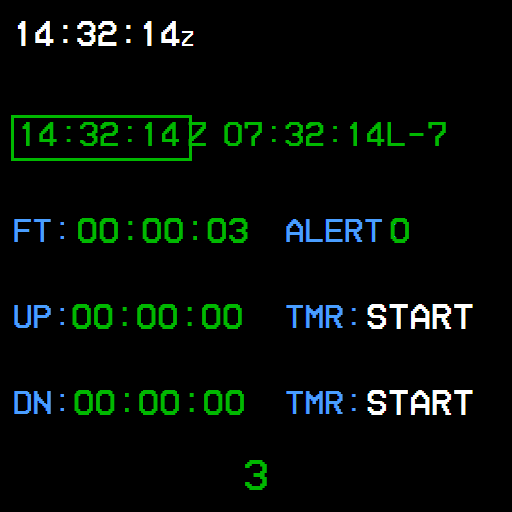
TIME Page - Clocks and Timers
Example UFCD TIME page
| Line | Function |
|---|---|
| GMT | Shows Zulu time. Entering a time here changes the simulator's clock (hours and minutes). Further LS1 presses let you hide the GMT clock or set/show local time. |
| FT: | Flight time. Starts automatically at take-off, stops after landing, and starts again from zero at the next takeoff and in a new flight. It keeps counting in outside views. ENT while boxed resets it. |
| ALERT: | Alert interval in hours (0-9, default 1). Every time the flight time passes a multiple of it, the advisory ALERT TIME comes on and the navigation system records an automatic fix on the MFD NAV/FIX page. ACK on the MFD clears the alert line; the advisory itself goes when you change the ALERT value or FT is reset. 0 switches both off. |
| UP: / DN: | Count-up and count-down timers. Type HHMMSS + ENT to set; box TMR: START and press ENT to start / stop. CLR twice resets. The count-down keeps counting past zero, and the MFD shows COUNT DOWN ALERT / COUNT UP ALERT when a timer runs out. |
Working with the MFDs
Using the UFCD Keypad for MFD Entries
Whenever a field is open for editing on any MFD (a boxed heading, altitude, baro, DP coordinate...), the UFCD lends its controls to that MFD:
- Open the field on the MFD (for example PFD R1 ALT). The UFCD scratch pad switches on by itself - a white bar runs across the whole bottom line, with black digits in its middle and the red cursor after them.
- The knobs now change the MFD value directly.
- To type instead: key the digits and press ENT. The number goes to the MFD field. If the MFD rejects it, it flashes in the pad. There is no need to press PAD - it would switch the pad off (press it again to bring it back).
Example UFCD scratch pad with 700
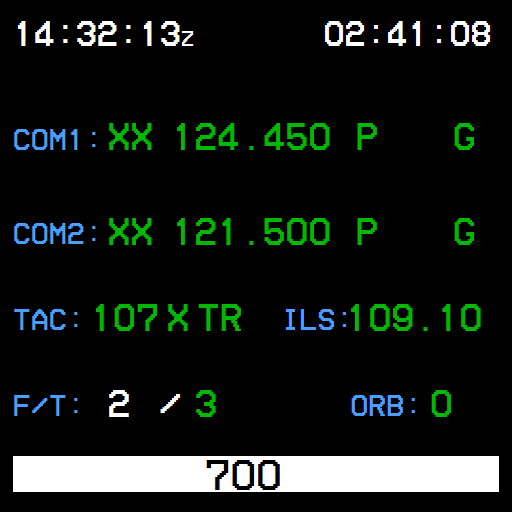
When every MFD edit has ended the pad switches itself off, digits and all. Left untouched for 15 seconds it goes off too; while an MFD field is open, that field's own 15 seconds count instead.
Examples: altitude bug 700 = 70,000 ft · baro 2992 = 29.92 · heading 270.
With the PFD BARO field open, the pad digits are an altimeter setting with an implied decimal point: 3001 = 30.01 inHg (22.00-31.00). The SFD has its own, separate altimeter setting on its own knob.
Remote MFD Paging
You can change the page on the center MFD from the UFCD, without reaching for its bezel:
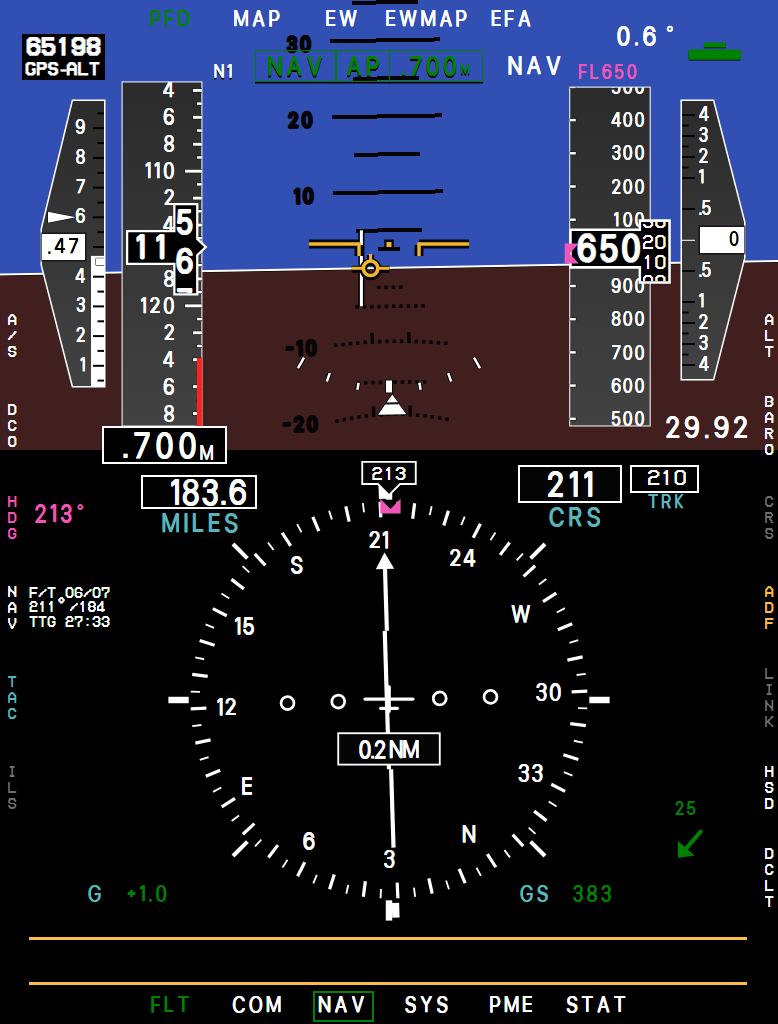
- Switch the scratch pad on with PAD - it must be empty (if it holds digits, press PAD twice). Then push the small knob twice within 2 seconds. The scratch pad reads REMOTE MFD PAGING and a green box appears on the center MFD, round the bottom legend of the branch it is showing.
- Turn the large knob to move the box along the bottom legends (FLT, COM, NAV, SYS, PME, STAT), the small knob to move it along the top legends of the branch shown. The first click on the other knob only moves the box to that row.
- Push the small knob: the center MFD shows the boxed page. Repeat as often as you like.
- Press PAD or ENT on the UFCD to finish. EDIT on any MFD also ends it.
Example MFD remote
Example REMOTE MFD PAGING
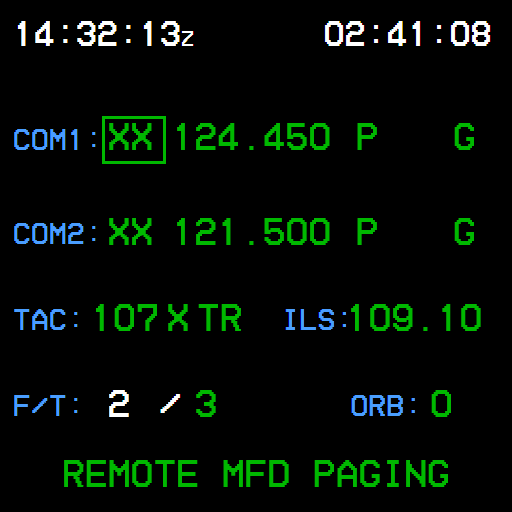
While paging, the keypad digits and CLR do nothing; G, FIX, IDENT, the LS keys and the page keys keep working. Paging cannot be started while an MFD field is being edited.
Audio and Backup Radio
Audio Panels
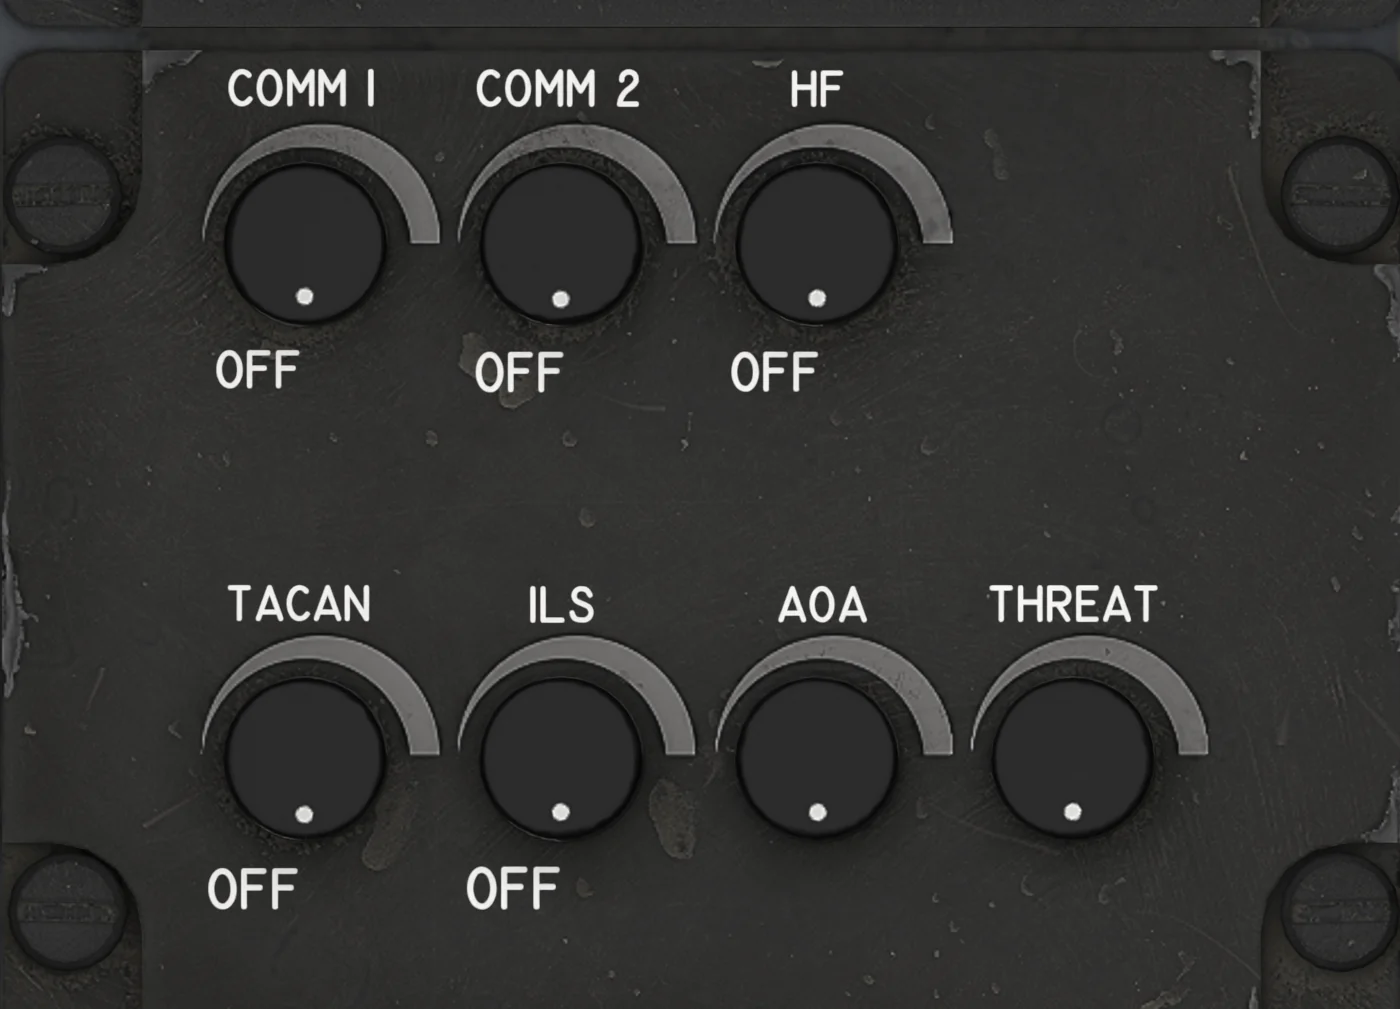
Two panels decide what you hear and which radio you talk on: the audio panel at the lower left of the main panel and the volume panel on the left console.
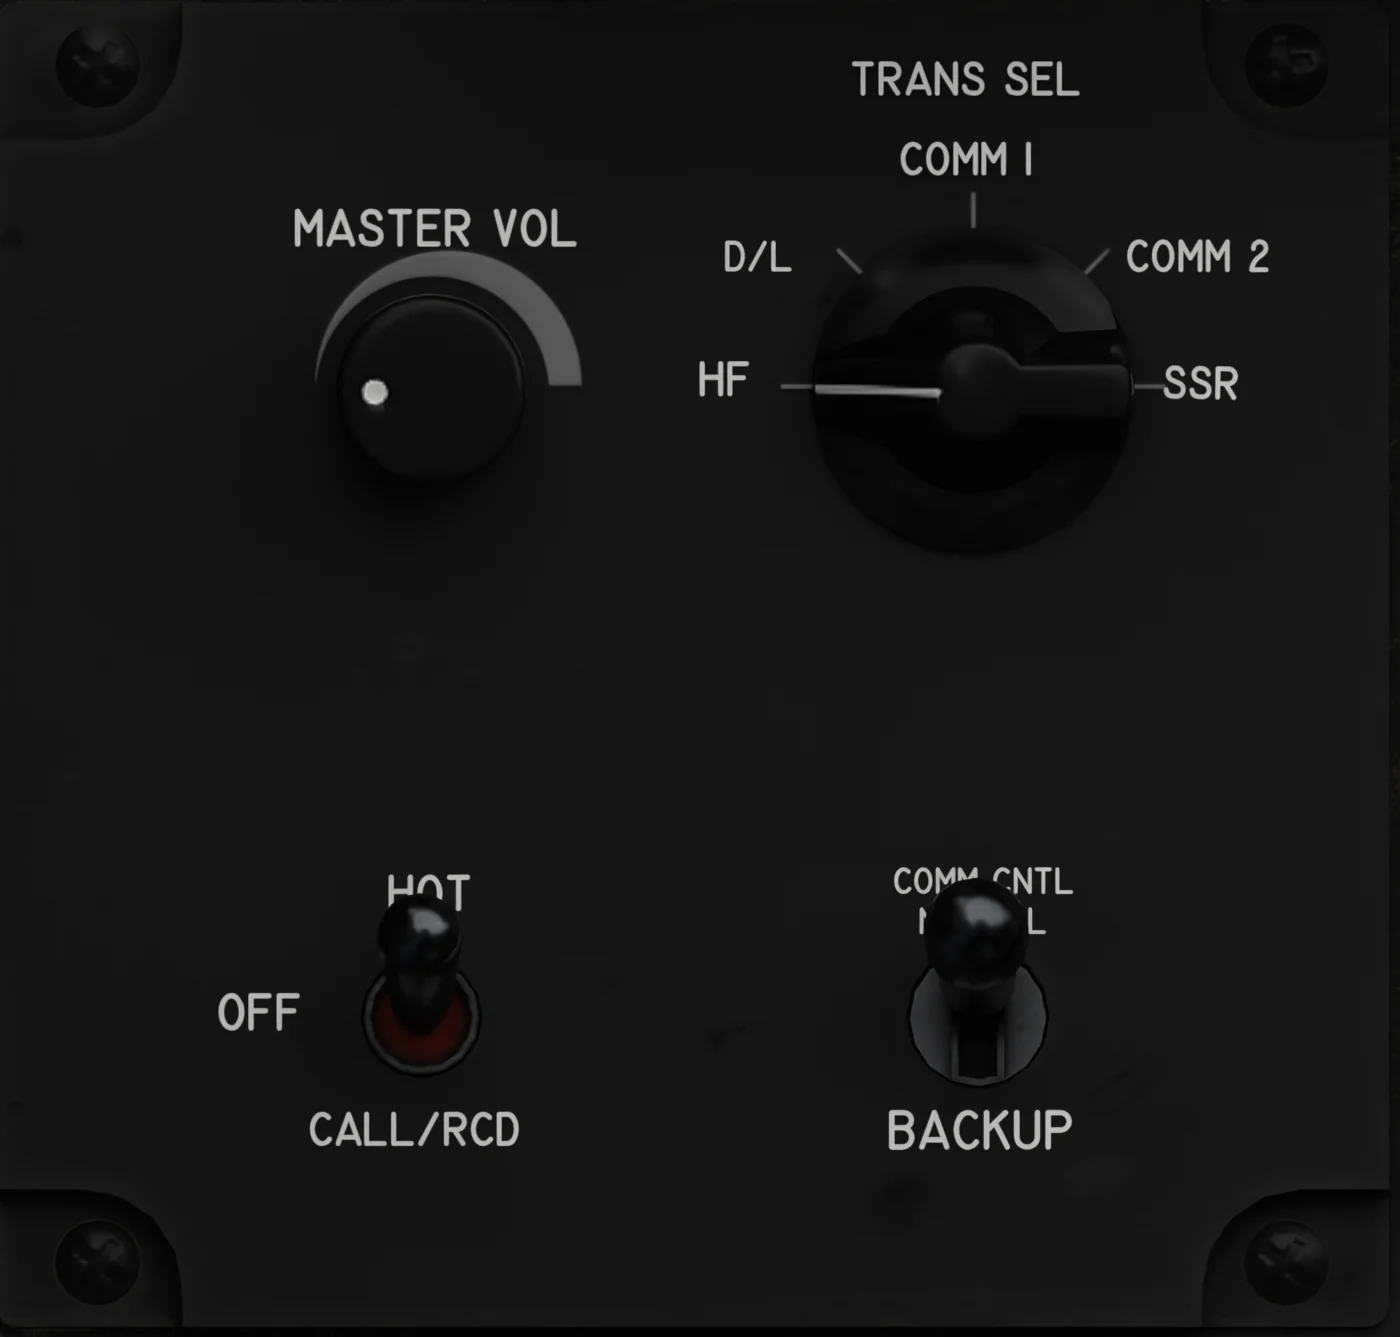
Audio panel
- MASTER VOLUME - Scales every radio and station ident. At the bottom stop it mutes all headset audio, warning tones and chase-car calls included.
- TRANSMITTER SELECT - HF / D/L / COMM 1 / COMM 2 / SSR. Picks the transmitter only; both COMM receivers are always heard. HF, D/L (the SATCOM radio, not simulated) and SSR transmit nothing.
- HOT MIC / CALL RCD - HOT / OFF / CALL/RCD. CALL/RCD is momentary and disables the transmitters while held. HOT has no effect (no intercom in the sim).
- COMM CONTROL - NORMAL / BACKUP. BACKUP hands the selected COMM radio to the ARC-210 backup panel; back to NORMAL restores the previous frequencies.
Volume panel
- COMM 1 VOLUME - COMM 1 receiver volume, multiplied by MASTER VOL. At the stop the radio is silent but stays on.
- COMM 2 VOLUME - COMM 2 receiver volume, multiplied by MASTER VOL. At the stop the radio is silent but stays on.
- HF VOLUME - No function in the simulator (there is no HF radio).
- TACAN VOLUME - TACAN ident volume, multiplied by MASTER VOL. At the stop the TACAN is off: you get the TACAN FAULT advisory, the UFCD shows dashes and autopilot TAC steering drops to basic roll.
- ILS VOLUME - ILS ident volume, multiplied by MASTER VOL. At the stop the ILS receiver is switched off.
- AOA VOLUME - Only the stop matters: there it silences the AOA approach, flare and touchdown tones. The stall tone always stays.
- THREAT VOLUME - Volume of the EW new-threat tone, multiplied by MASTER VOL, in four steps. Silent at the stop. See EW System.
ARC-210 Backup Radio
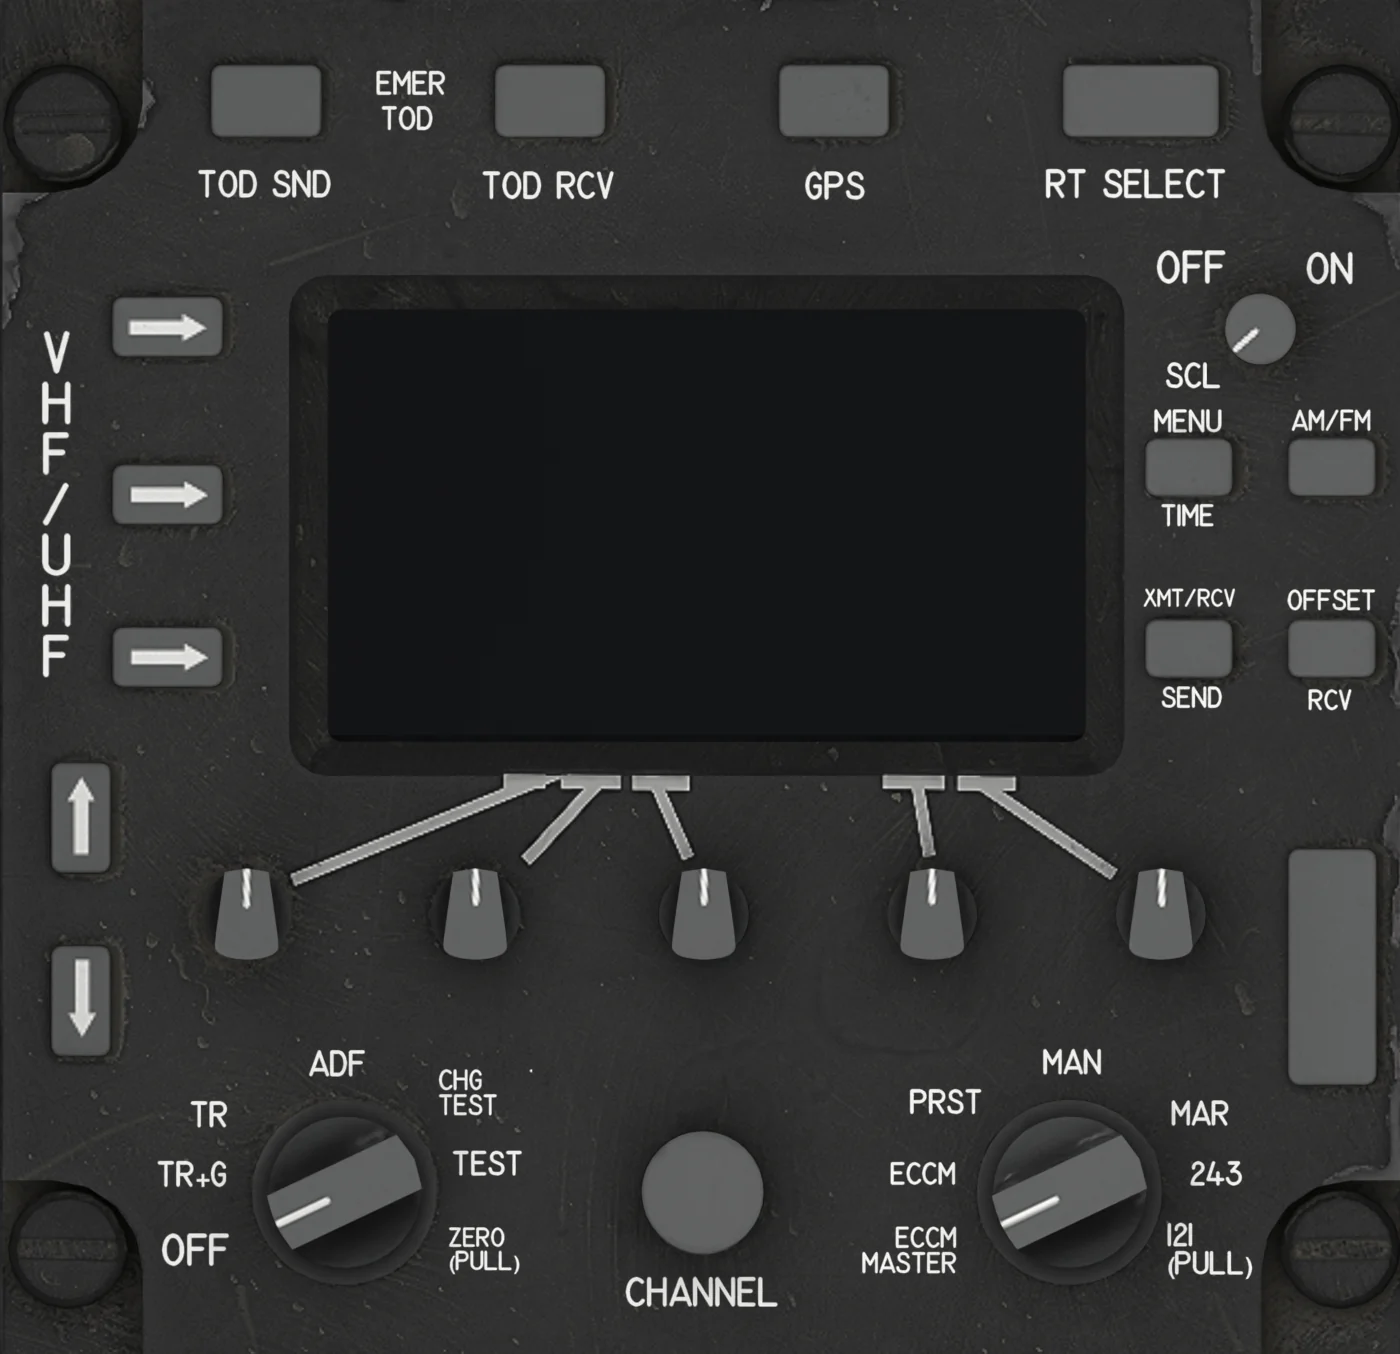
- ARC-210 DISPLAY - Shows frequency, mode and preset channel. The ARC-210 is the sim's COM 3, independent of the UFCD; brightness on the up / down arrow buttons.
- OPERATING MODE (left knob) - OFF / TR+G / TR / ADF / CHG PRST / TEST / ZERO. OFF switches the radio off; TR or TR+G to use it; CHG PRST stores presets.
- CHANNEL (centre knob) - Selects the preset channel, 1-25, used in PRST; with CHG PRST it picks the channel to store.
- FREQUENCY MODE (right knob) - ECCM MASTER / ECCM / PRST / MAN / MAR / 243 / 121. MAN: frequency knobs; PRST: presets; 121: guard 121.500. The rest are not simulated.
The ARC-210 control panel on the left console is the simulator's COM 3. It is independent of the UFCD.
- Right rotary = frequency mode. MAN: tune with the five frequency knobs (the radio retunes on every click). PRST: use the channel knob to pick presets 1-25. 121: guard 121.500.
- Left rotary = operating mode. TR or TR+G for normal use. CHG PRST lets you store a new frequency in the selected channel (dial it, press the top line key LOAD). TEST runs a display test.
- Coverage is VHF 118.000-136.990 MHz with 8.33 kHz channels. The top line key in MAN swaps back to your previous frequency. Brightness has its own up/down buttons.
- Positions and buttons for functions the simulator cannot provide (ADF, 243, maritime, SATCOM, encryption, menu items) show UNAVAILABLE or are decorative. Presets you change are not saved between flights.